The Auto-Calendar is a useful feature for keeping track of your schedules and
appointments. Ideally you could set up a tree for each year. Let's assume you wish to
track your schedules for the year 2000. You could begin by creating a new document of the
Empty document type. Having done this you can now create date entries for each month.
First create a new folder called 2000 by doing one of the following.
1 From the vertical icon bar on the left of the program window
click on the New Folder icon.
2 From the Folders menu on top of the program window click
on the New Folder command.
Choose the option Tree Folder option and click OK.
The program window shows you a text box titled Auto Calendar and an icon below it titled
1999. First fill in the text box with a name that you find appropriate. For example you
could call it Schedules and Appointments. After this you rename the folder 1999 to 2000.
To rename it you can do one of the following.
1 Place the cursor on the folder 1999 and right-click. Select
the Rename Folder option.
2 Click on the Rename this Folder icon on the vertical icon bar on the
left of the program window
3 From the Folders menu on top of the program window click
on the Rename Folder command
In the text box type in 2000. After this maintaining a record is a simple matter. Place
the cursor on the folder 2000. If you wish to insert the current date you can do one of the
following
1 Right click on the folder 2000.
2 From the vertical icon bar on the left of the program window
click on the Insert current date to auto calendar tree folder
icon
3 From the Folders menu at the top of the program window
select the Insert current date into autocalendar command.
A folder showing current month appears with the date entries arranged below it. Your
details can be entered into the white area to the right of the tree structure. Should you
wish to enter back-dated entries, simply perform the following steps.
First right-click on the sign indicating the drop down list and then left click. Choose
your month by clicking on either + or û and choose the date. A folder indicating the
month appears at the appropriate place followed by the date.
You can organise your auto calendar into several folders. For example, you could have
different folders for different kinds of activities. You could have one folder to show
daily gas consumption throughout the year. You could have another to record what you have
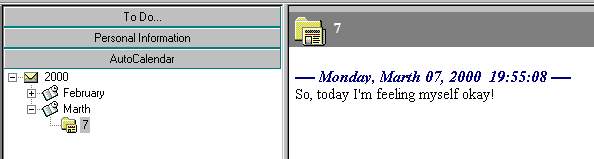
read every day and so on. Once you have begun to use your auto calendar it will look
something like this.